The Student’s Guide to a Clean Kitchen
- Home /
- News & Advice /
- The Student’s Guide to a Clean Kitchen
- December 10th, 2013
- No Comments
- Posted in Uncategorized
Unless you’re Mary Poppins or Monica from Friends, cleaning isn’t exactly the ideal way to spend a day; however it is a necessary part of life and as Mary said, ‘in every job that must be done, there is an element of fun’.
For many, the kitchen can be the biggest room to tackle with its numerous appliances proving a haven for dirt and grease. While this may well be the case, getting your kitchen to glisten isn’t as hard as you might think. With the help of this useful guide, some cleaning products and plenty of elbow grease you’ll soon have your kitchen so clean you could eat your dinner off it (not that we’d recommend it). Remember, the cleaner your house is, the easier it will be to get your full deposit back at the end of the year!
So, turn the radio up loud, don your marigolds and grubbiest clothes and let’s get stuck in!
What will you need?
- Sponges/cloths
- Scouring pads or a scraper
- Oven cleaner
- Multipurpose kitchen cleaner
- Washing up liquid
- Salt crystals
- Bicarbonate of soda
- White Vinegar
- A tea towel
- Bowls
- Kettle
- Newspaper
Oven
From dripping cheese to over flowing sauces, the oven can take a bit of a battering so can often be the most time consuming appliance to clean but don’t panic, you’ll get there.
Before you start, lay out some newspaper on the floor in front of your oven to avoid creating a puddle and extra cleaning. If you have an electric oven ensure you turn it off from the mains before cleaning and likewise with a gas oven, make sure you turn off the gas.
Firstly, remove any racks from within the oven and place them in a sink of warm water with some washing up liquid. Spray inside the oven with the cleaning product and then leave to soak for about an hour.
In the meantime, clean the racks in the sink, before going back and giving the oven a good scrub and wipe down. When cleaning inside the oven pay particular attention to the bottom and the door, the build-up in these places can sometimes be surprising. Once everything is clean and dry, either by using a tea towel or leaving to dry naturally, you can slide the racks back in.
It’s a good idea to keep the oven door open for a while after cleaning to ventilate it and get rid of any oven cleaner fumes.
Stove
So, you’ve done the hard bit with the inside of the oven, now it’s time to tackle the stove.
Just like the oven racks, if you have any gas burners, or other removable items take them off and place them in a sink full of warm water and washing up liquid.
Spray the cleaning product on to the surface of the stove and leave for a few minutes before thoroughly wiping down the whole surface, paying particular attention to any burnt on food or grease.
Next, move on to the bits in the sink, which once clean you should leave on the drainer to dry before replacing them on the stove.
Fridge Freezer
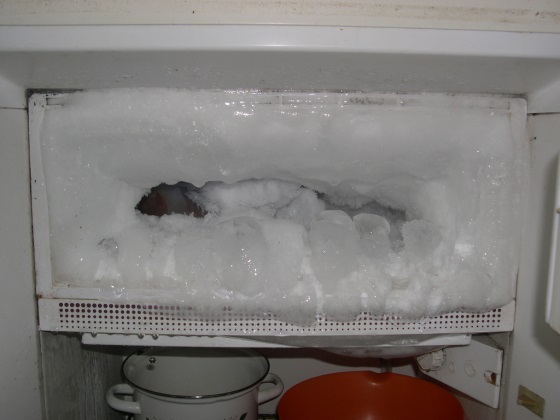
The fridge freezer requires you to clean it in two stages, firstly by defrosting it and then by washing it down.
First of all, start by removing all food from inside the fridge freezer. Make sure it is all properly covered and place it somewhere cool for the duration of the cleaning. Next, take out any removable parts, such as drawers and shelves and again place in a sink of hot water. This is another instance where it would be a good idea to lay out some newspaper on the floor to catch any drips.
After you’ve removed everything from the fridge, turn it off at the mains and place a bowl of boiling water inside both the fridge and freezer compartments to speed up the defrosting. You can always speed it up further by dipping a cloth into hot water and dabbing it on to any areas covered by ice. Allow the fridge freezer to defrost for a few hours, changing the hot water every now and again.
Once everything has defrosted you can move on to cleaning. Pour some cleaning product into a bowl of warm water, dip a cloth into it and wipe down all of the surfaces, including the doors. Use a tea towel to dry inside the fridge, shelves and drawers before putting everything back it was. Now you’re free to fill it up with food again.
Dishwasher
It’s not uncommon for people to think that an appliance that washes things doesn’t need washing itself, however that’s not the case. Although, fortunately cleaning a dishwasher is easy and not something that needs to be done on a regular basis.
Start by checking the holes in the spinning arms for any debris and using a toothpick or similar item to clear them. Next, take a damp cloth and run it along the edges of the door, then moving to underneath it, wiping away any debris.
After you’ve done this you can turn your attention to the drain, check for any debris and remove anything you can by hand. For the next step, use dishwasher salts and put the empty dishwasher on a short cycle. Once this has finished, use a dish brush or sponge to wipe down the racks inside.
Finally, using some multipurpose cleaner and a cloth, wipe down the outside of the dishwasher. Now your dishwasher should look as good as new!
Microwave
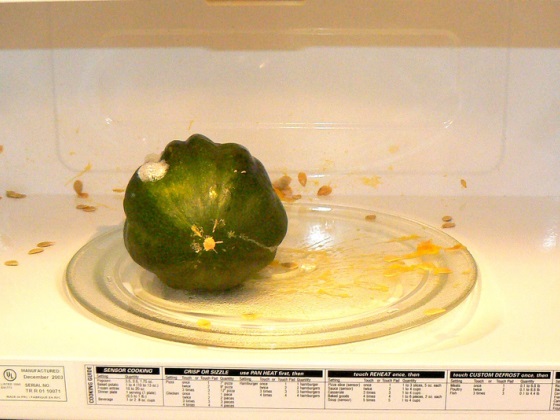
The mighty microwave – spinning a frozen block into a hearty meal in three minutes flat. It’s no wonder then that it sometimes gets in a bit of a state.
Start by unplugging the microwave from the mains, then remove the plate and (yep, you guessed it) soak it in the sink. Meanwhile, use a damp cloth dipped in a bowl of soapy water to wipe down the insides.
Once you’ve done this return to the plate, which may need a bit of extra attention, then once dry replace it in the microwave.
Toaster
It’s easy to forget that the toaster needs to be cleaned from time to time, but fortunately it’s not very difficult to do.
Start by unplugging the appliance so as to clean the inside, which can be achieved by putting several large salt crystals into the slots. Once you’ve done this you should cover the slots with greaseproof paper, securing it with elastic bands.
Shaking the toaster up and down a few times will dislodge any crumbs stuck inside the toaster. You can then empty the crumb tray and remove the greaseproof paper. Don’t worry if your toaster doesn’t have a crumb tray, just turn the toaster upside down over a bin and shake out all of the crumbs. At this stage it is important to make sure that all the salt crystals are removed. Then all you need to do is give the outside of the toaster a wipe down with a damp cloth and it’s good to use it again.
Kettle
Descaling a kettle is a simple task but not one people think to do very often. Fortunately it isn’t an arduous task and can be done simply by pouring white vinegar and water in equal parts into the kettle and leaving it in there for an hour, without boiling.
Then just pour away the water and the lime-scale should go with it. If you find there is some residue just use a damp cloth with a bit of bicarbonate of soda to wipe down the inside. Once you’ve done this all that’s left is to rinse out the kettle a several times before you can start using it again.
And relax…
By now all your appliances you should look as good as new. Now all that’s standing between you and a super clean kitchen is wiping down the surfaces and mopping the floor. What better way to celebrate than with a well earnt cup of tea and thinking about what you can spend that deposit on!
Image sources:
http://www.flickr.com/photos/abbamouse/3622763569/
http://www.flickr.com/photos/katesheets/2692969671/
http://www.flickr.com/photos/fabliaux/162725030/
http://www.flickr.com/photos/vickispix/227806779/


